Install Info
How To Install Landscape Lighting: Step-by-Step guide


Learn the basics of landscape lighting and how to install your new landscape lighting fixtures with this step-by step guide. Installing low voltage landscape lighting is a good do-it-yourself project that most homeowners can complete. While line voltage (120V) lighting must be installed by a licensed electrician, low voltage (12V) is much safer; it carries little risk of electrical shock and the wire can be buried in shallow trenches. But before starting, please refer to the National Electrical Code® and your local electrical codes.
Also, gather any tools you might require for the job – most importantly, a set of wire strippers and a shovel or trenching tool. Additional tools may be required, depending on the needs of your project.
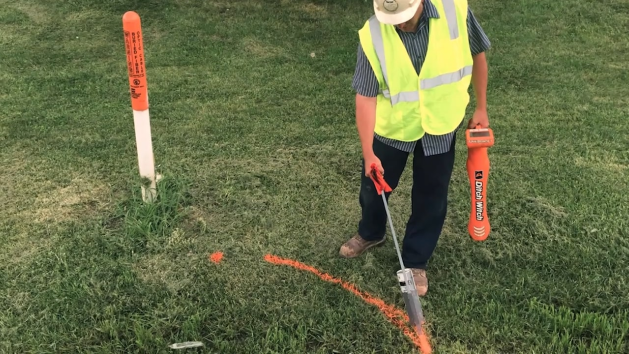
Step 1: Physically mark any existing cable or irrigation lines, so that they aren’t damaged during the landscape lighting installation.

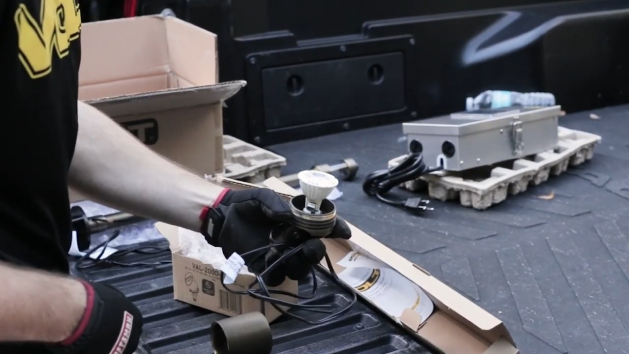
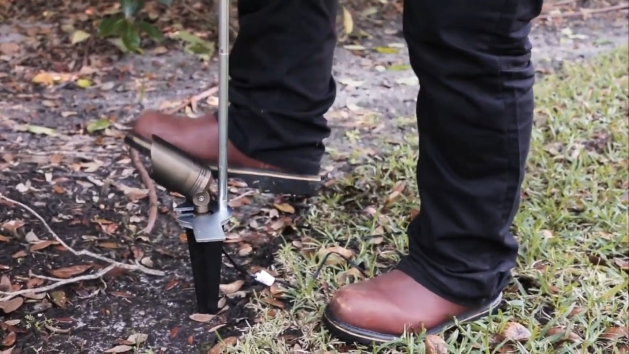
Step 2: Unpack and assemble your landscape lighting fixtures. Take everything out of its box, then install bulbs in any lamp-ready fixtures, and attach mounts. There are many ways to mount fixtures, but most fall under one of these three categories. Stake mounting is where a stake is attached to the fixture and then placed directly into the ground. Surface mounting is used when a fixture must be attached to a hard surface and usually requires a power drill. In-ground mounting is when a fixture is mounted directly into the earth, so having a spade, shovel or post hole digger is a big help.

Step 3: Clear a path for your wire runs and place your fixtures based on the project map you created during planning.

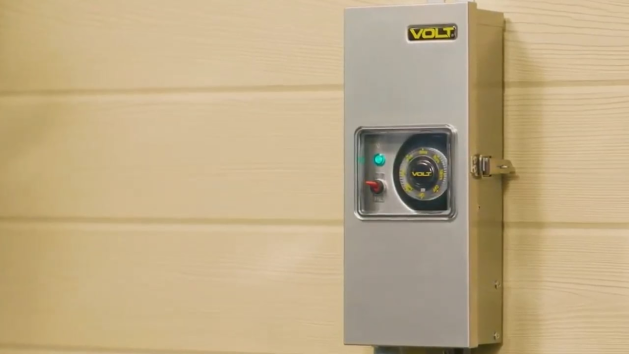
Step 4: Mount your low voltage transformer. When choosing a location for your transformer, it’s important to keep a few things in mind. Transformers must have 1 foot of clearance in every direction, be at least 30 feet away from water features and be on a surface that can withstand the heat it produces.

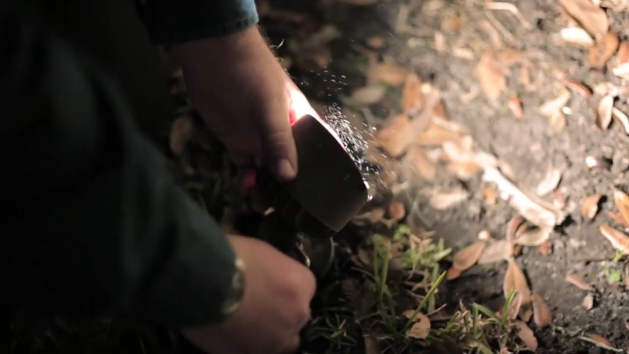
Step 5: Lay out and dig your trenches for your main wire runs. Most people use a shovel or spade for trenching, but more specialized tools are also available. The exact depth of the trenches is determined by your local codes, but low voltage cable is typically buried at least 6 inches deep. Once dug, place the wires in your trenches and cover them completely with dirt. Be sure to leave at least 5 feet of unburied wire at each end, so that you have room for adjustments later.


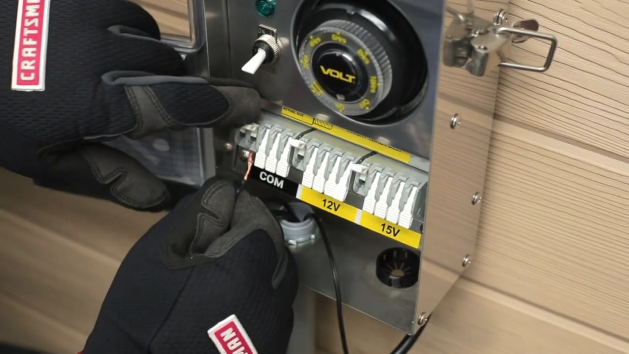
Step 6: Begin connecting your system. For a simple connection process, use a clamp connect transformer, which uses levers instead of the screw mechanism to clamp to the wires. Start by connecting your transformer to your main runs. This is done by placing one strand of wire in the com terminal and the other in a terminal marked either 12 volt or 15 volt. The 12 volt tap is for shorter wire runs with fewer fixtures while the 15 volt tap is for longer runs that draw more power. Wire exiting the transformer should be protected with conduit until it reaches the ground.

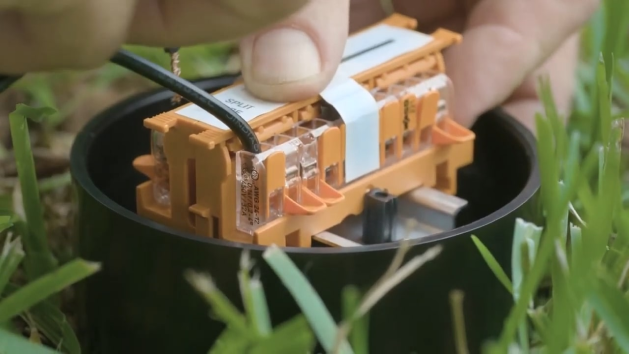
Step 7: Connect fixtures by splicing their lead wires to your main runs. The most common method is to use twist-on style connectors. These connections are made by stripping the last half inch of wire at each end, then twisting them together in a clockwise direction. Then insert the connection into the cap and twist clockwise until the wire begins to spin with the cap. Another option is to use clamp connect junctions. To use these, simply invert the stripped wire ends into the terminal, push down the lever and close the housing. This protects the connection from moisture and corrosion. If you have a cluster of fixtures, you may want to use a hub (pictured here). Hubs allow you to easily connect multiple fixtures in a single location. Hubs can either be stake-mounted above the ground or buried underground.

Step 8: Once all of your connections are made, you can test your system. Turn on your transformer and then walk around your property to ensure that every fixture is lit. If one is out, it may be that you have a bad connection on your system.
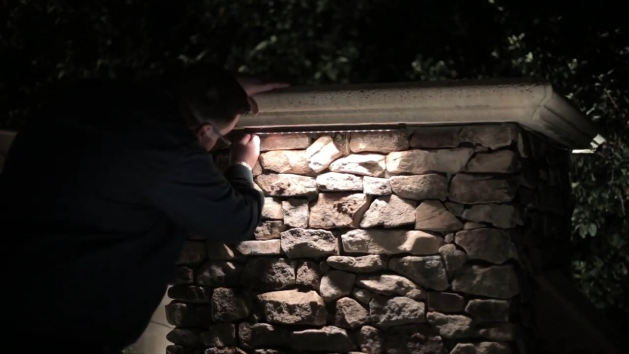

Step 9: If all your fixtures are properly functioning, you can now begin the adjustment phase of your installation. Wait until nighttime before starting adjustment; that way you can clearly see the lighting effects created by each fixture. Now walk your property again and make sure each light is aimed at the desired feature in your landscape. You will also want to keep an eye out for glare coming from your fixtures. Glare can be remedied by adjusting the angle of the fixture or the position of its glare guard.

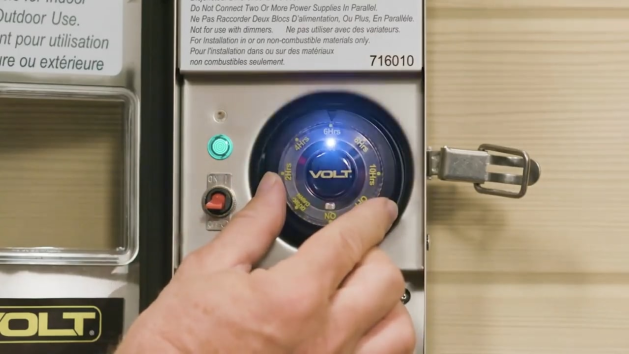
Step 10: Finish your project by burying any remaining wires and programming the timer on your transformer.